Communities Manager
The Communities Manager gives you information on the number of communities you have joined. From here you can join a new community or manage the communities you have already joined.
Joining a Community
First, you need to go to the Community Management page using the people icon in the Navigation Bar.
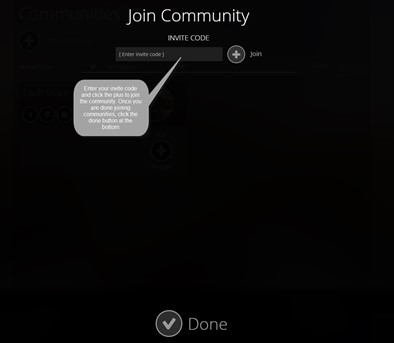
Next, on the Community Management page, click the Join Community button in the top left.
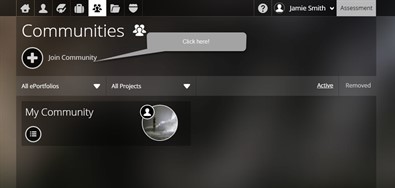 After you click the Join
Community button, you will be brought to a page to enter
the invite code for the community. This will be provided by the
moderator of the community (likely your professor). Once you enter
the code, you just click the Join button to add
that community and then click the done button at
the bottom.
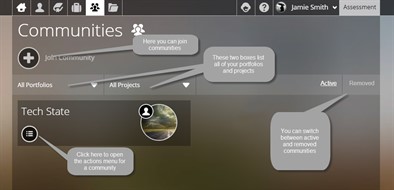
Community Management Page
The community management page has several features to offer. First, you can easily add more communities from this page using the Join Community button. You can also access the 'perform actions' button for each community you are a part of. Lastly, you can view any removed communities (communities you added and then later left) by clicking on the removed tab.
Sharing a Project in a Community
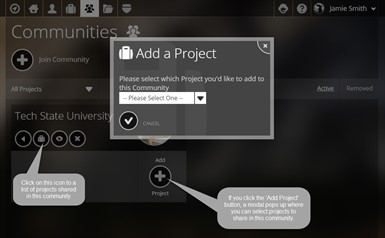
From your community management page, it is easy to share projects. First, you will need to click on the perform actions button for the community you would like to work with. Next, you will need to click on the Projects icon (briefcase). This will show you any currently shared projects. If you click the add button, a window will pop up and allow you to select whichever project you would like to share.
Other Options
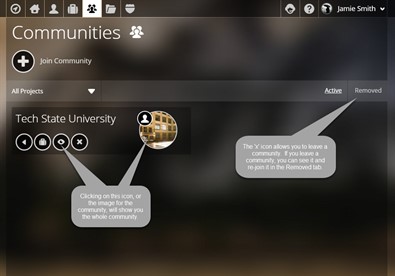
The final two actions that you can perform in a community are to view the whole community and leave the community. By clicking on the eyeball icon or the image next to the community's name, you can view the whole community. This will show, depending on the community's settings, community members and projects shared in the community. The x will remove your account from the community.
